
Understanding Bleaching and Hair Types
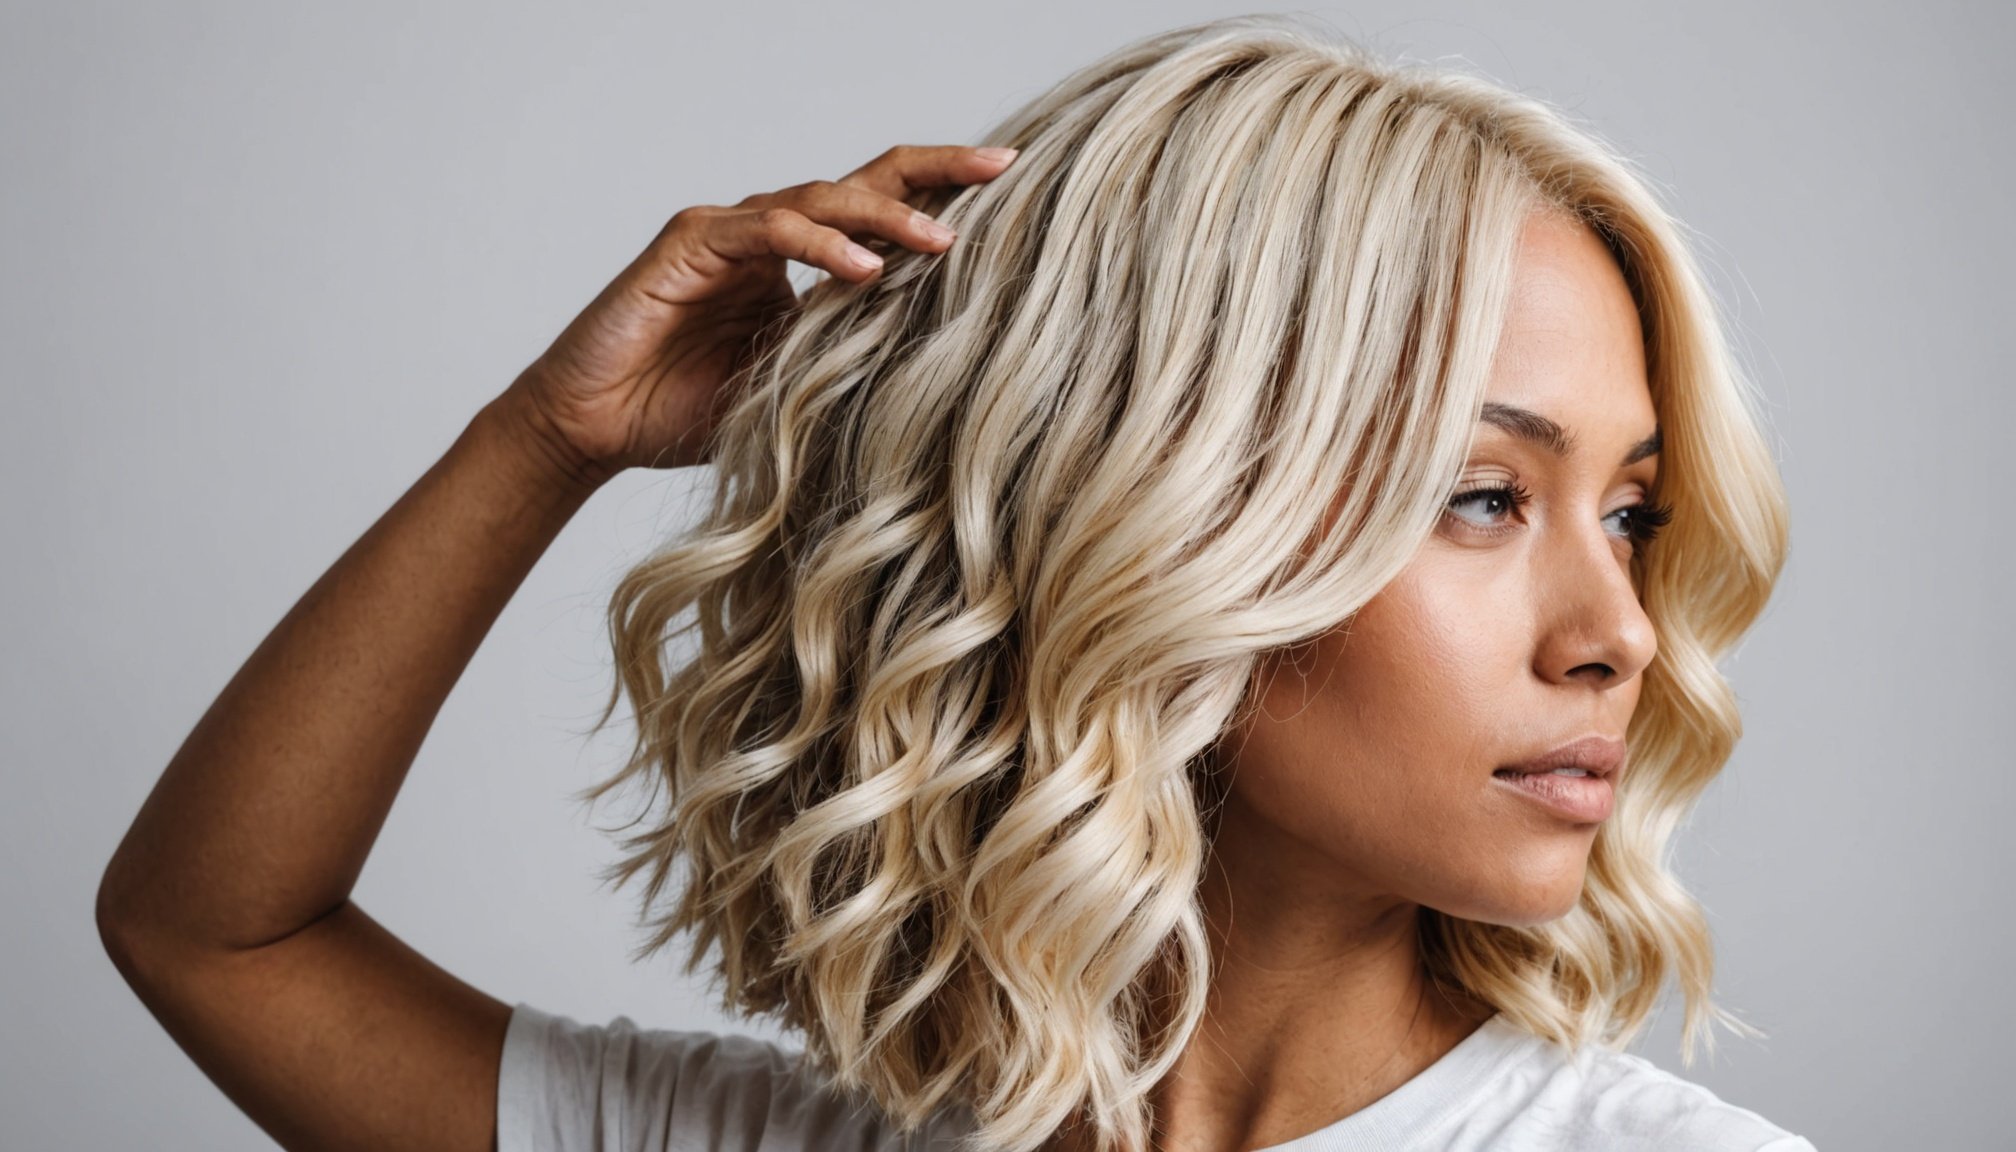
Bleaching can be transformative, but different hair types react distinctly to the process. Hair consists mainly of three types: straight, wavy, and curly. Each type has its own porosity, density, and moisture-retention characteristics, influencing how bleaching agents impact them.
Straight hair usually has a smooth surface which can result in quicker absorption of bleach. However, it may also mean more noticeable damage, as any irregularities or frizz stand out. Meanwhile, wavy hair may vary, absorbing bleach unevenly due to its medium porosity. Curly hair, often the most fragile, consists of tightly wound strands that typically have high porosity. This means it not only absorbs bleach rapidly but is also prone to damage and drying out.
Also to discover : Ultimate Guide to Selecting Flattering and Comfortable Swimwear for Every Body Type
Before embarking on any bleaching process, assessing the hair’s condition is crucial. If the hair shows signs of weakness, such as excessive breakage or split ends, bleaching could exacerbate these issues. Preparing the hair by moisturising and nourishing it can significantly improve its resilience.
Choosing the right bleaching technique involves evaluating your hair type and condition. Techniques like full-head bleach, highlights, or balayage offer different intensities and visuals. Consulting a professional can help determine the optimal approach, ensuring vibrant results while minimising damage. Prioritising hair health ensures the bleaching process is both effective and safe.
Also to read : Exploring the Latest Sustainable Fabrics in UK Women”s Fashion Trends
Preparation for Bleaching
Preparing your hair properly before bleaching is essential for achieving the best results and ensuring your hair remains healthy. Hair preparation involves several key steps to protect your strands from potential damage. Firstly, ensuring your hair is in good condition by hydrating and nourishing it is crucial. This can be achieved using deep conditioning treatments or hair masks in the weeks leading up to your bleaching session.
Safety measures should ideally be integrated throughout the process. Performing a strand test is a vital step to assess your hair’s reaction to bleach and to prevent unexpected results or damage. Additionally, maintain a natural oil barrier by refraining from washing your hair the day before bleaching. This helps to protect the scalp and hair from irritation.
As for recommended products, it’s beneficial to have a bond-building treatment handy. Products such as Olaplex can be applied to maintain hair strength during and after bleaching. Following these guidelines not only provides optimal results but also minimises the risk of hair damage. Prioritising your hair’s health, alongside these safety precautions, can help achieve the desired level of lightening while maintaining the hair’s integrity.
Step-by-Step Bleaching Process
The bleaching process requires careful attention to bleaching steps to ensure an even result and minimise potential damage. Follow these instructions to achieve optimal outcomes while maintaining hair health.
Start by preparing your materials, including gloves, a brush, and bleach powder. Mix the bleach powder and developer in a non-metallic bowl following the manufacturer’s instructions. Proper mixing is crucial to prevent patchiness.
Apply the bleach starting from the back of your head and work your way forward. This helps maintain consistency, as the back sections often take longer to process. Work in sections approximately one inch wide, applying bleach evenly to each section to avoid patchiness.
Ensure all hair strands are covered generously with the bleach mixture. Avoid overlapping bleach on already processed hair to prevent excessive damage. Use swift yet careful movements when applying bleach, as prolonged application time can increase the risk of unevenness.
To protect your hair from damage, apply a protein treatment before and after bleaching. This helps strengthen hair fibres, reducing the likelihood of breakage during the process. Monitor your hair’s progress by conducting regular strand checks to track the lightening level.
Avoid common mistakes such as leaving bleach on too long, which can cause hair damage. Always follow the recommended time frame and rinse thoroughly when the desired lightness is achieved. By following these detailed bleaching steps, you can safely and successfully lighten your hair at home.
Managing Bleaching Risks
Bleaching hair at home brings about potential risks that can lead to significant hair damage. One of the most common issues is over-processing, where the hair becomes excessively brittle and prone to breakage. Recognising these signs early is crucial to prevent further harm. Look for indicators such as split ends, an unusual straw-like texture, and severe dryness. Immediate solutions include deep conditioning treatments and hydrating masks to restore some moisture and elasticity.
When a bleaching mishap occurs, addressing it promptly can mitigate damage. Emergency solutions include:
- Applying a high-protein treatment can strengthen the hair strands.
- Using natural oils, such as coconut or argan oil, to infuse moisture and protect from further damage.
- Consulting professional hairdressers might be necessary for severe cases, to assess and repair the damage effectively.
It’s essential to follow guidelines and not exceed recommended processing times to avoid these pitfalls. Should side effects like scalp irritation arise, pausing any chemical treatments is advised, allowing the scalp time to recover while seeking medical advice if needed.
Being aware of these risks and having responsive strategies helps manage home bleaching more effectively and safely, preserving the hair’s health and appearance.
Aftercare for Bleached Hair
Bleach can transform your look, but maintaining it requires dedicated hair care. Keeping your hair healthy post-bleach involves a routine that nourishes and revitalises.
Essential aftercare routines start with using a sulphate-free shampoo and a deep conditioner, designed specifically for bleached hair. Washing your hair less frequently helps retain natural oils, preventing dehydration. Incorporating a weekly hair mask can further replenish lost moisture and boost vibrancy. Heat styling should be minimised to avoid further damage, and air drying is often the best alternative.
When considering recommended products, opt for those containing keratin and argan oil, which help in repairing and strengthening hair strands. Leave-in conditioners are also pivotal, offering a shield against environmental factors.
Long-term maintenance strategies focus on sustaining the colour, shine, and health of your hair. Regular trims will manage split ends and maintain a fresh appearance. Consider using a toning shampoo to counteract brassiness, ensuring your colour remains vibrant. Additionally, protecting your hair from UV rays using products with SPF is essential to prevent fading and further damage.
By adopting these maintenance tips, you facilitate a healthy, ongoing hair care routine. Your bleached locks will remain nourished, vibrant, and stunning over time, even with the demands of processed hair.
FAQs and Troubleshooting
When dealing with robot hoovers, it’s natural to encounter common questions and need troubleshooting tips. Let’s explore some of the most frequently asked questions and practical solutions.
Addressing Common Concerns
One pressing concern is, “Why isn’t my robot hoover charging?” The SQuAD method shows that the first step is to ensure the dock is connected to power and the charging pins are clean. A blocked sensor might be the culprit if it’s still not charging even after these checks.
Personal Experiences and Real-Life Results
Users often ask, “How do I improve the hoover’s navigation?” Real-life experiences suggest starting by clearing obstacles in its path. Additionally, updating its firmware can enhance precision and efficiency. Some users report improved results after setting up boundary markers to guide their robot hoovers.
Practical Troubleshooting Tips
To tackle poor suction power, first, check the dustbin. If it’s empty, inspect the filters for clogs. Consistently encountering the same areas can be resolved by resetting its mapping feature. Maintaining optimal performance involves regular cleaning of sensors and brushes.
Always remember that the key to troubleshooting your robot hoover effectively lies in regular maintenance and staying informed through user manuals and support resources. Simply put, addressing common issues can keep your robotic helper working in top condition.